Printing Pancakes With A Camera Dolly?
My kids are enthused by 3D printing, casually remarking about things they could ‘just print’. Recently they asked to build a pancake printer – what a cool idea!
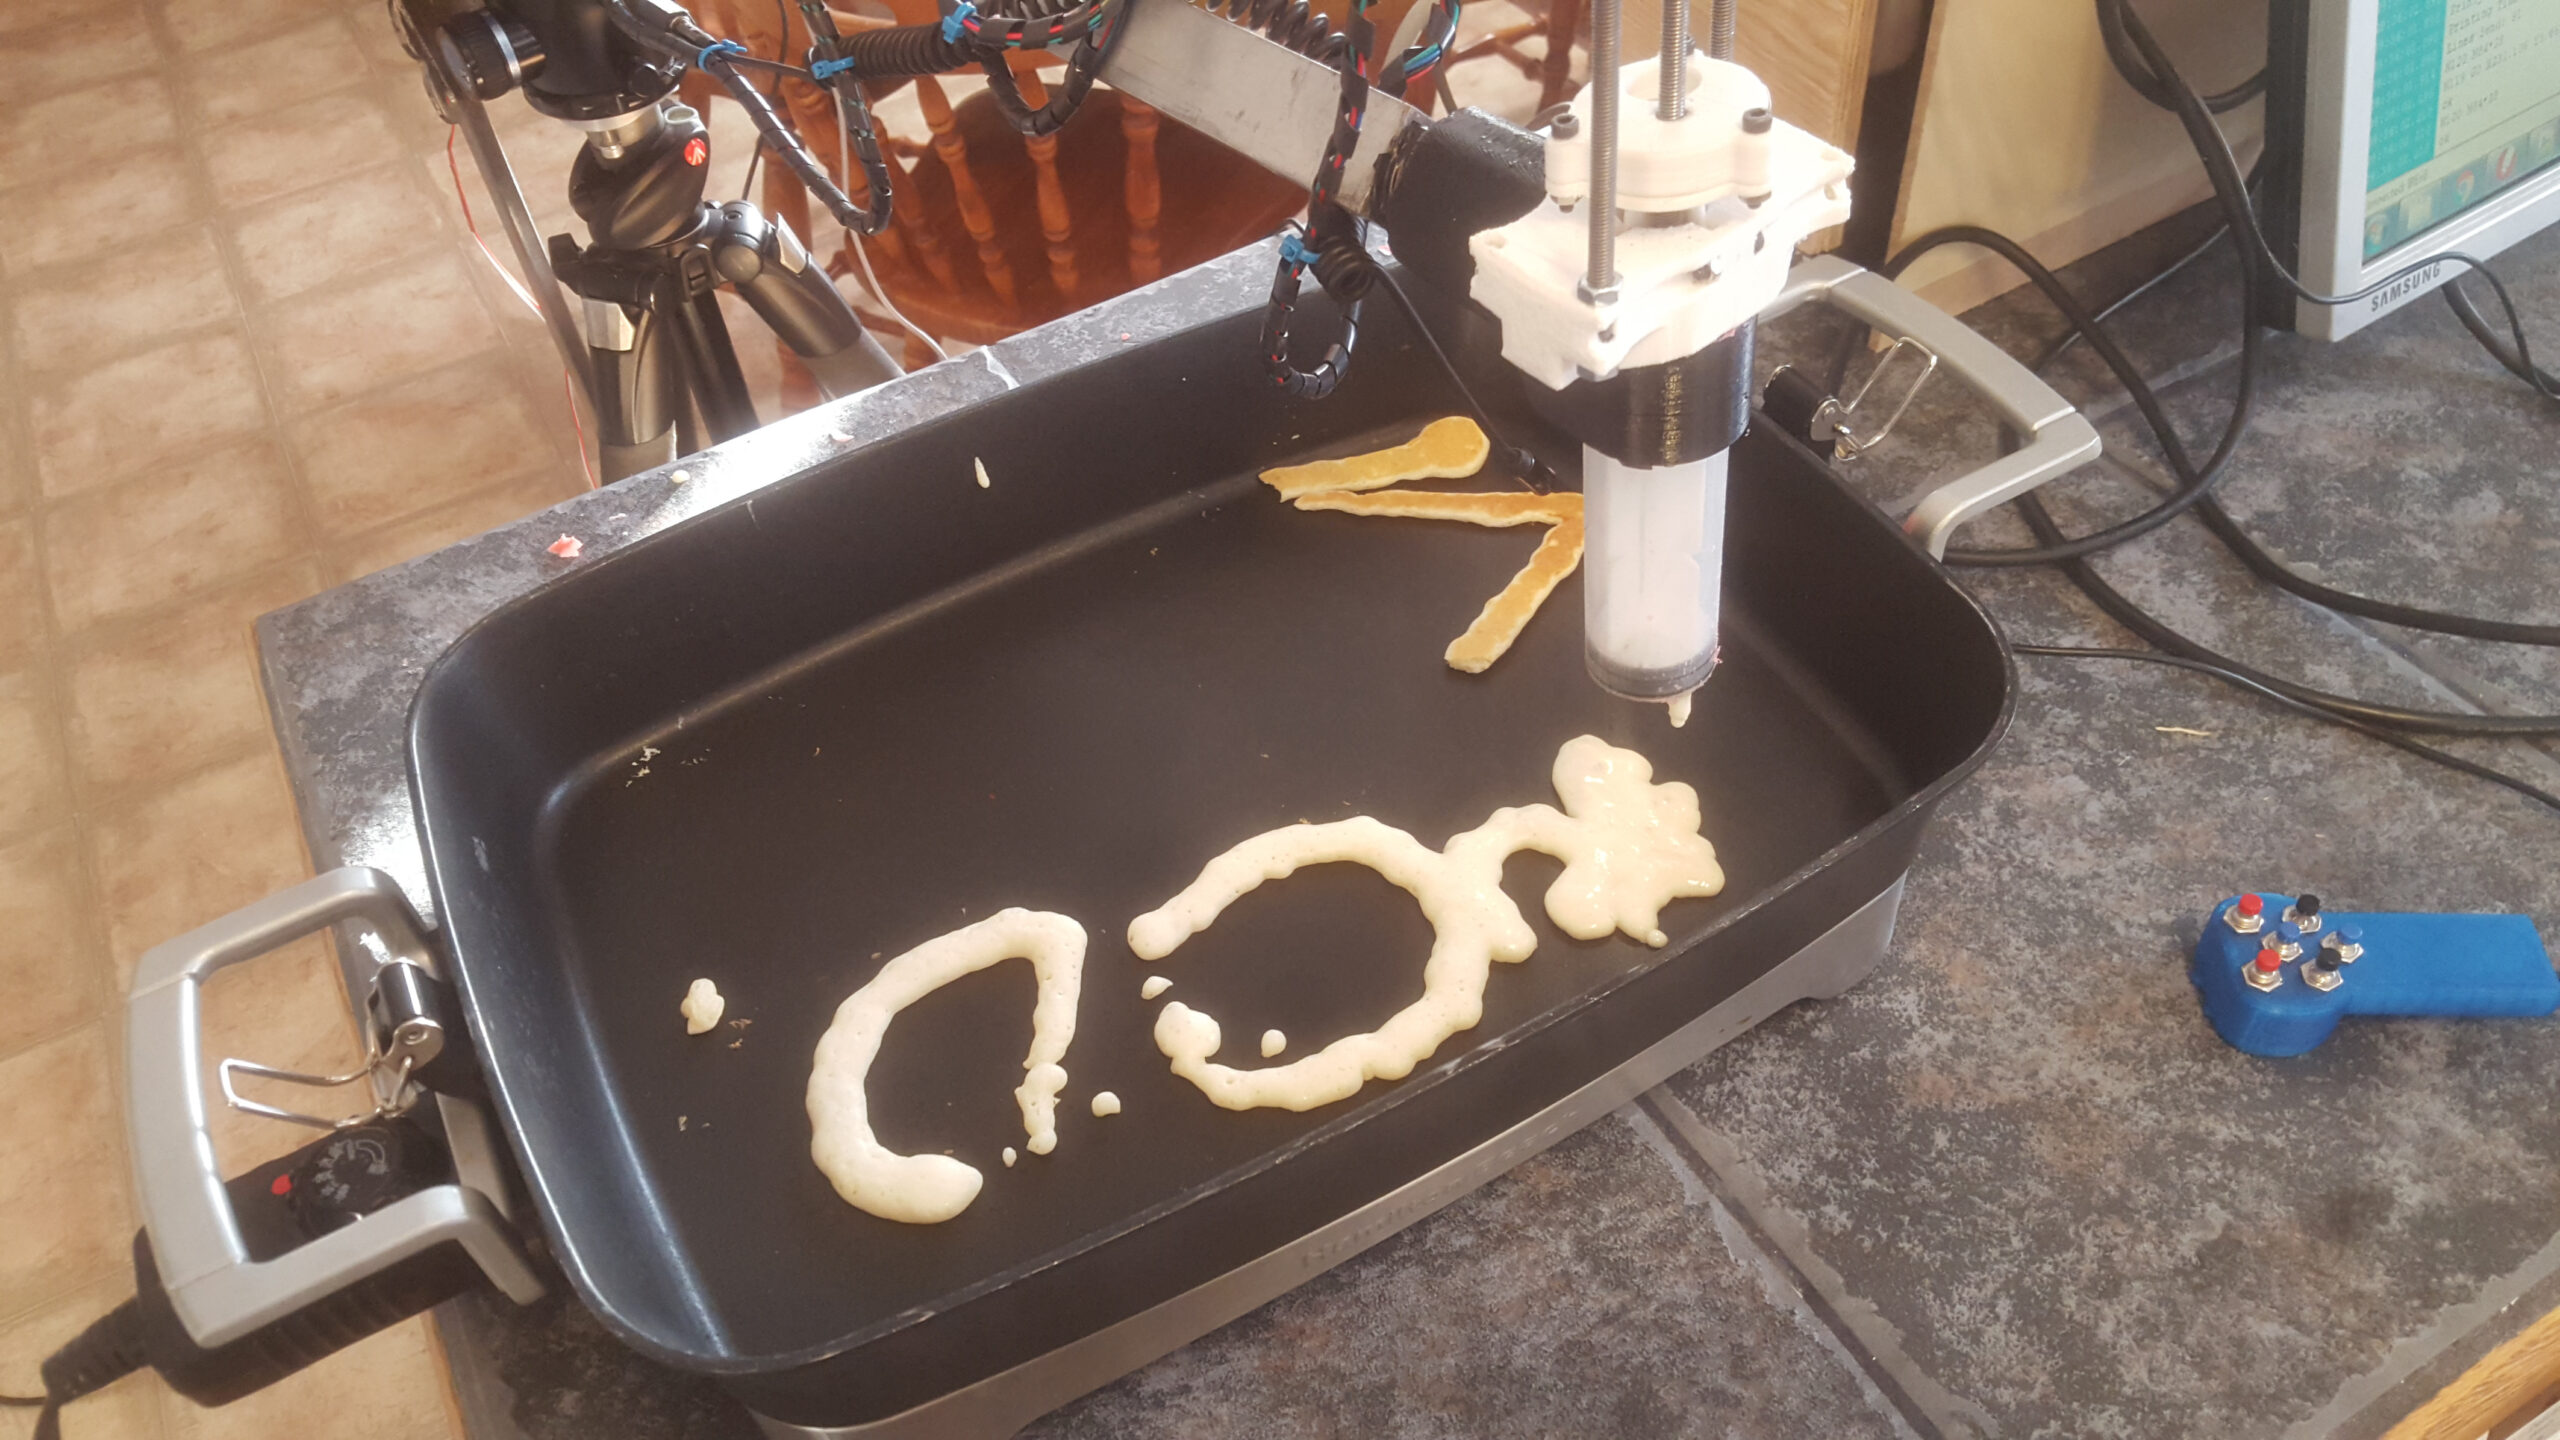
I thought about how to build a simple batter extruder and gantry. It didn’t take long to realize that IREnE, my new DIY camera dolly, is the perfect platform to use as a ‘theta-style‘ gantry! So I set about adding pancake printing functionality to the camera dolly.
Extruder
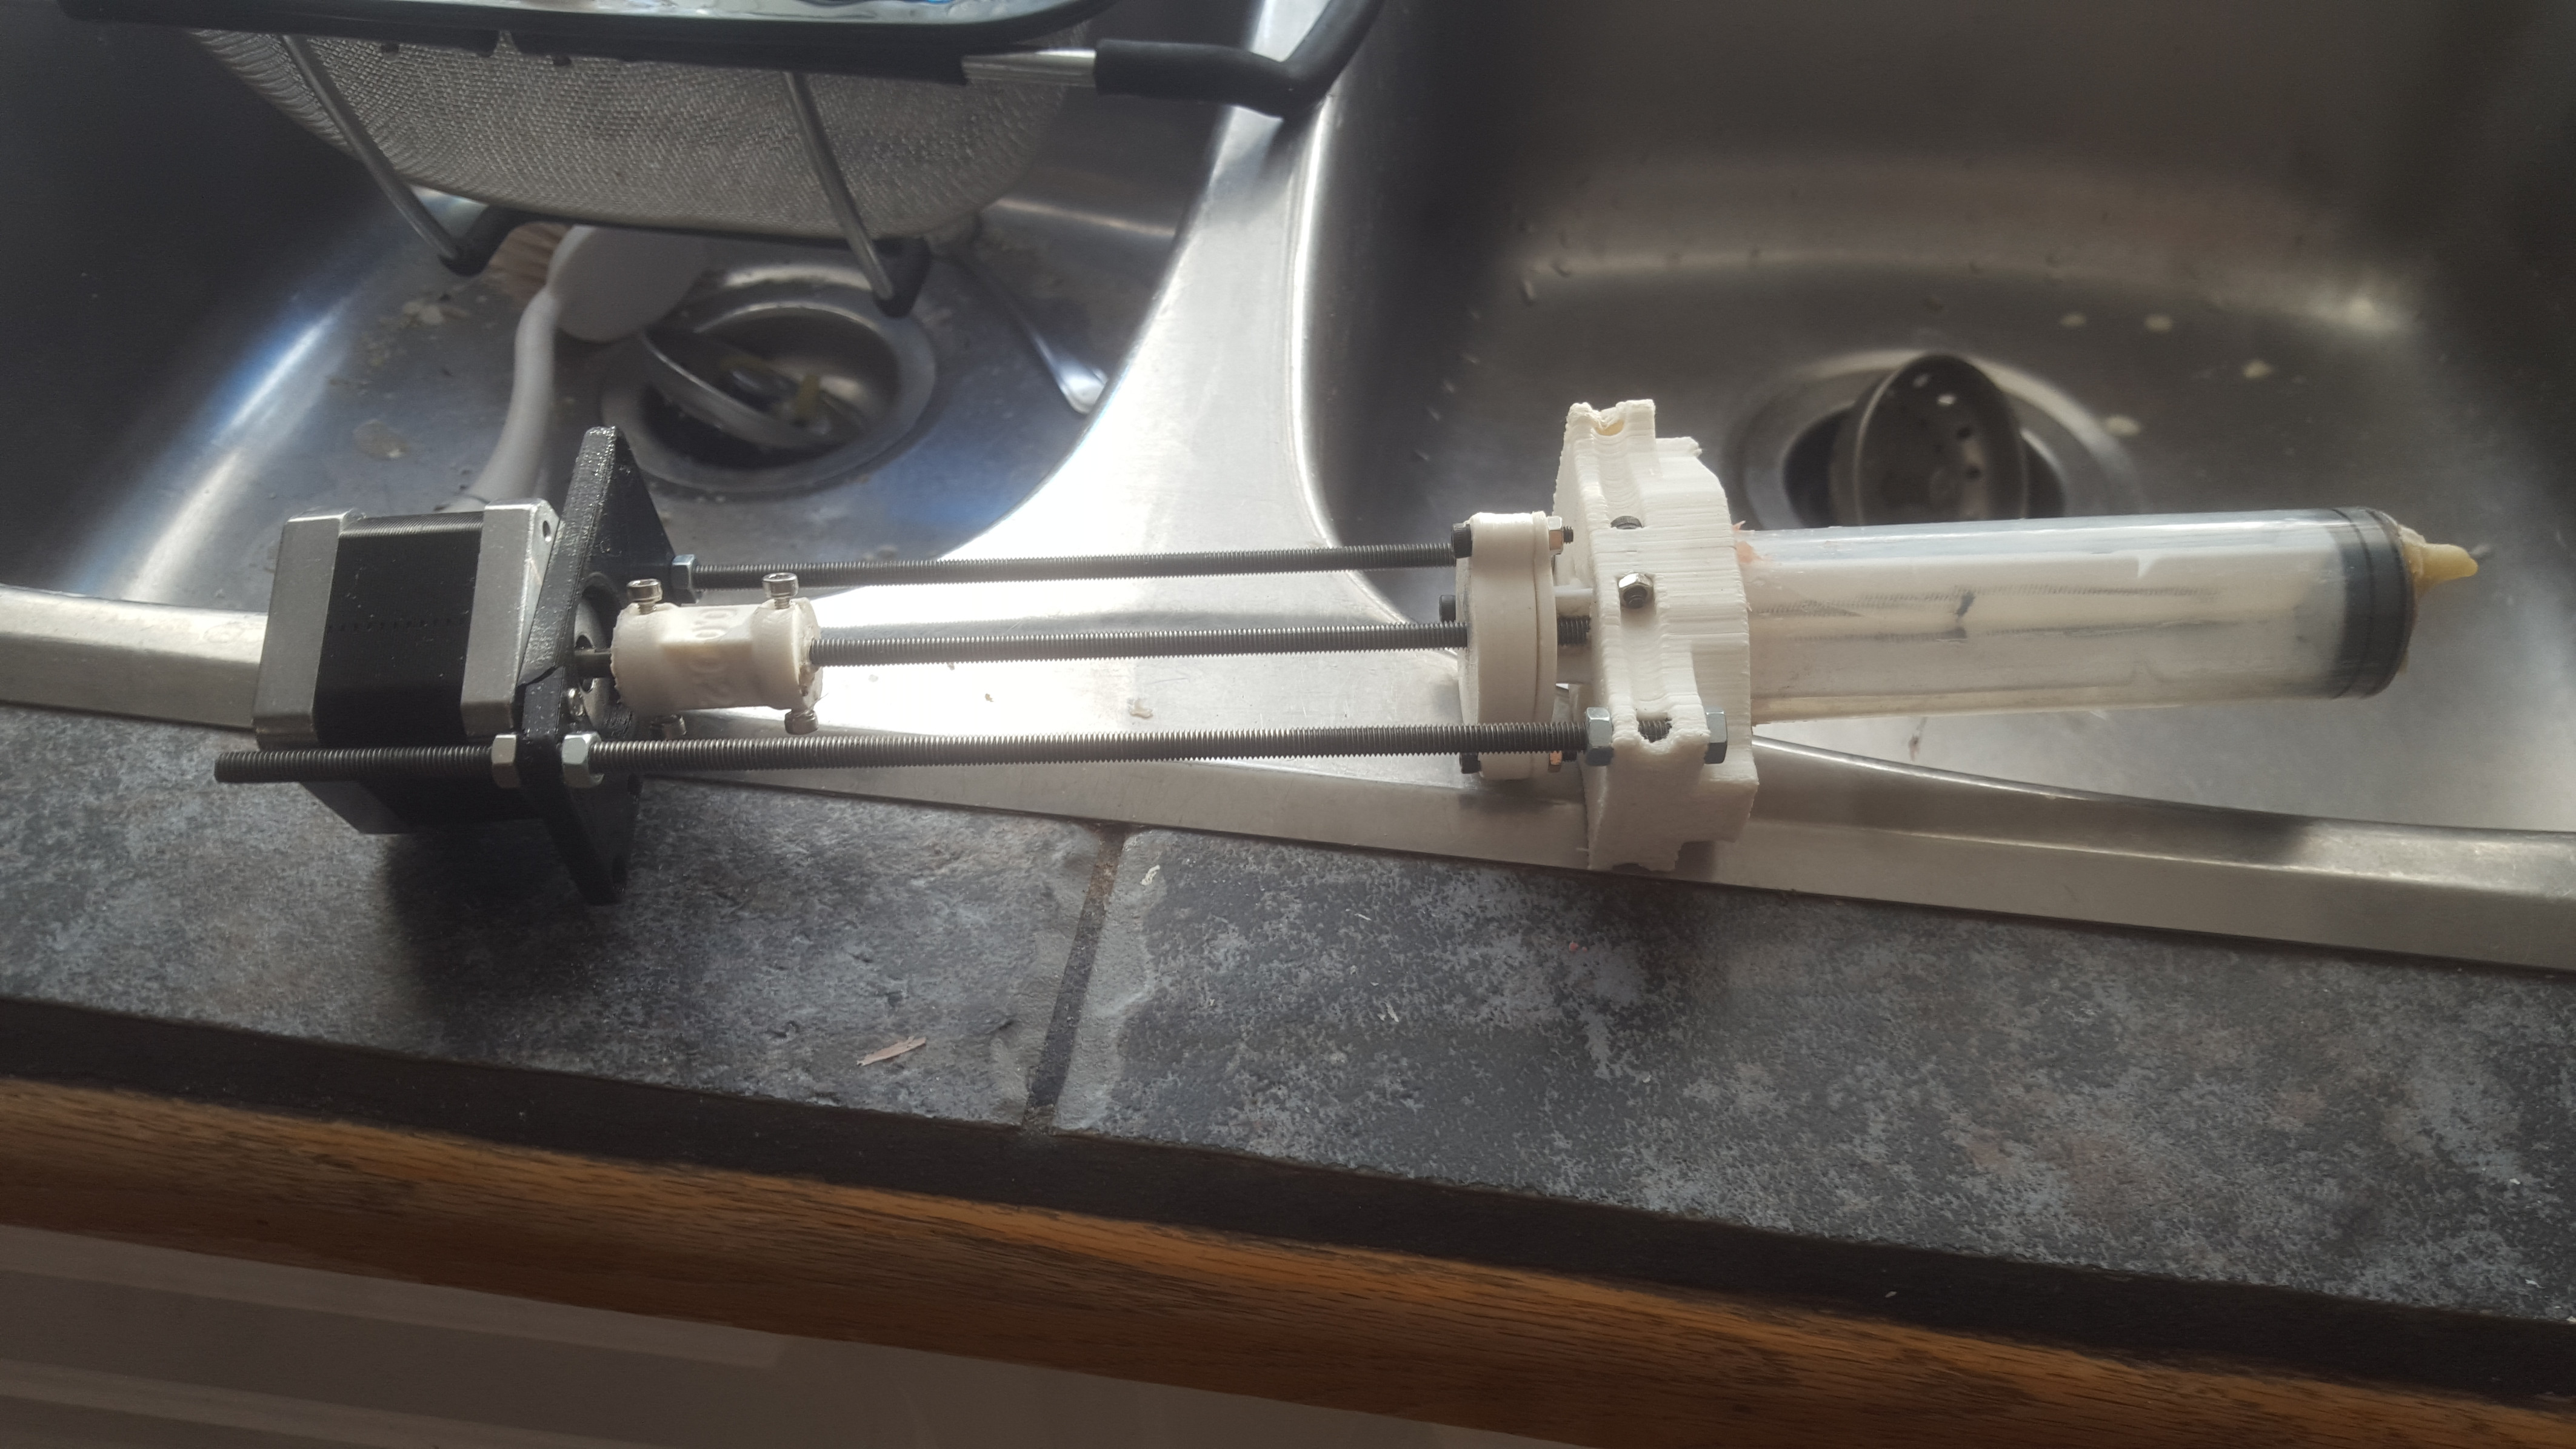
The other pancake printers I’ve seen online (like Mexican Viking’s) use compressed air to push batter from a reservoir through a nozzle. I did it a little differently and used a syringe as the extruder. IREnE already has a motor driver set up for the Secondary Rotator. Simple to swap this component for the extruder.
Pancake Design
The makers of the Pancake Bot provide Pancake CAD/CAM software for free on their website. Perfect! The current version is 1.2.0 beta. Hopefully is remains free…

Unfortunately the workspace dimensions cannot be adjusted. Maybe the setting is buried in the software? I couldn’t find it.
The output gcode is optimized for their printing platform. I wanted to optimize it for my printer, so I wrote a vbscript gcode processor. Just drop the original *.gcode file onto the script, and it spits out a modified copy (*_e.gocde). It removes pauses (G4) and homes (G28 & G0 X0 Y0), adds an extrusion factor (M221), splits the moves into travel (G0) and print (G1) with appropriate feed rates – and a few other things. You can find it in the project file repository.
CNC Parser
Much of the required code was already in the dolly. Since I intended to send the print gcode to the controller using Repetier Host, I needed to add a compatible gcode parser. Here’s a HUGE shout-out to Dan Royer of marginallyclever.com for providing an awesome how-to guide on writing a gcode parser.
I didn’t want to modify the original IREnE firmware. So the parser is discrete and can be removed from the firmware with a simple switch (commenting out #define CNC_PANCAKE). The parser doesn’t do anything until it recieves a command over the UART interface (by a USB connected to a computer).
Only a handful of commands are recognized: G0, G1, G4, G90, G91, G92, M3/M76, M5/M75, and M221.
Recipe
Gather up some flour (3 cups), eggs (2), butter (90 mL), sugar (1 tablespoon), baking powder 2.3 tablespoons) , salt (0.7 tablespoons), and milk (~2.6 cups). Mix! Add more milk to thin the batter

The first go-around, I didn’t mix the batter long enough. There were enough chunkies that the syringe kept getting plugged. Make sure it’s mixed VERY WELL.
Results
The extruder works, but I can see why other printers use larger reservoirs. There’s enough batter in the syringe for one decent pancake. I found runny batter tends to make very thick lines, while thick batter doesn’t extrude consistently. Further experimentation required to find the right consistency.

I probably won’t use the syringe again. A large reservoir requires a valve to control flow. Probably a valve at the nozzle would work best – A motorized plug / stopper, or maybe a sphincter… I MEAN A FLUID-REGULATING VARIABLE APERTURE. Yeah, that’s a much better word for it!
Merry Christmas!