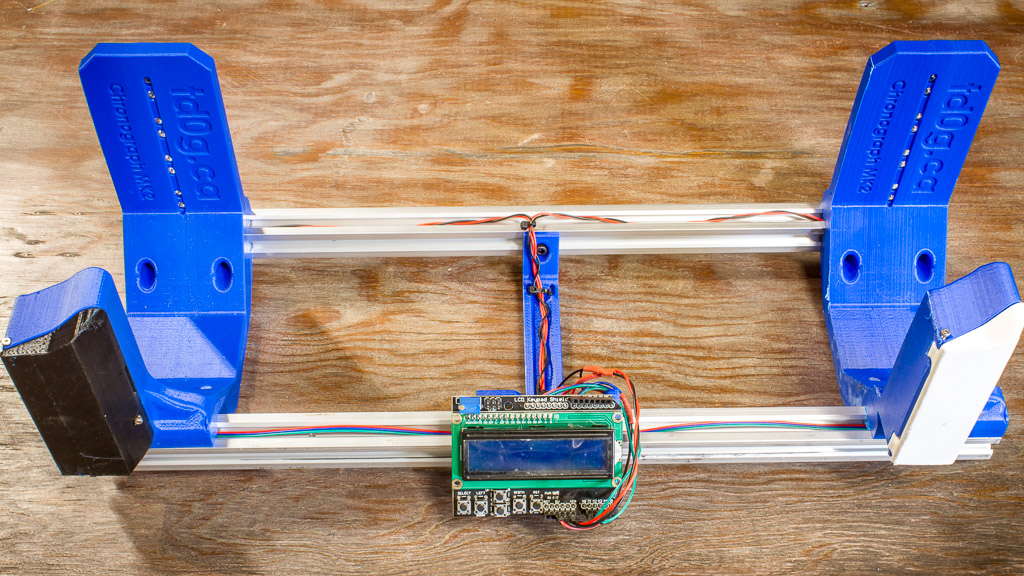
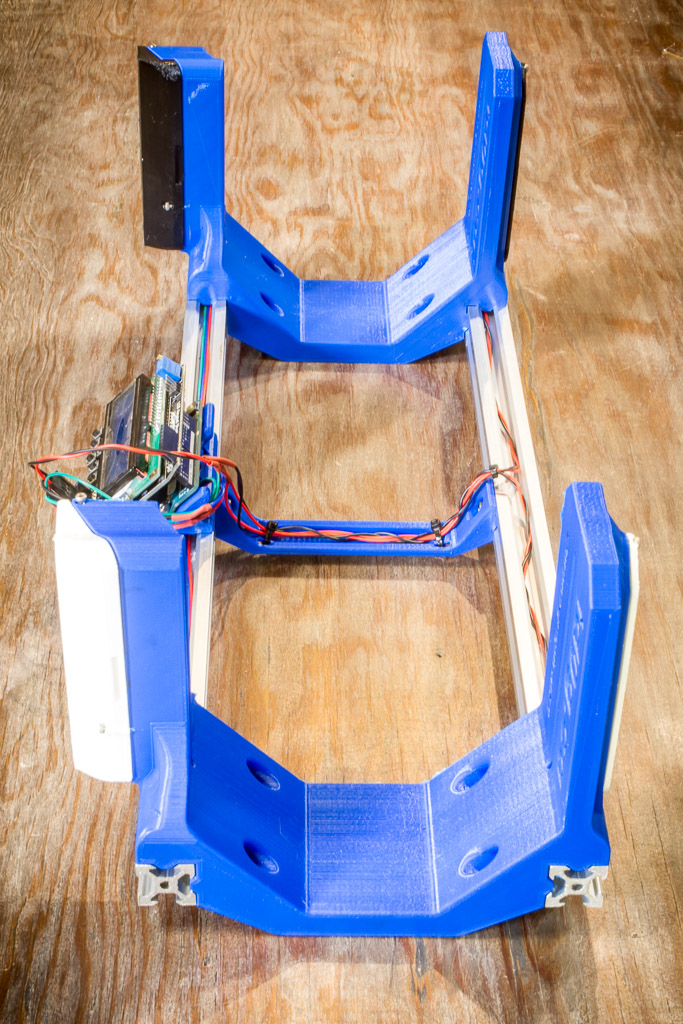
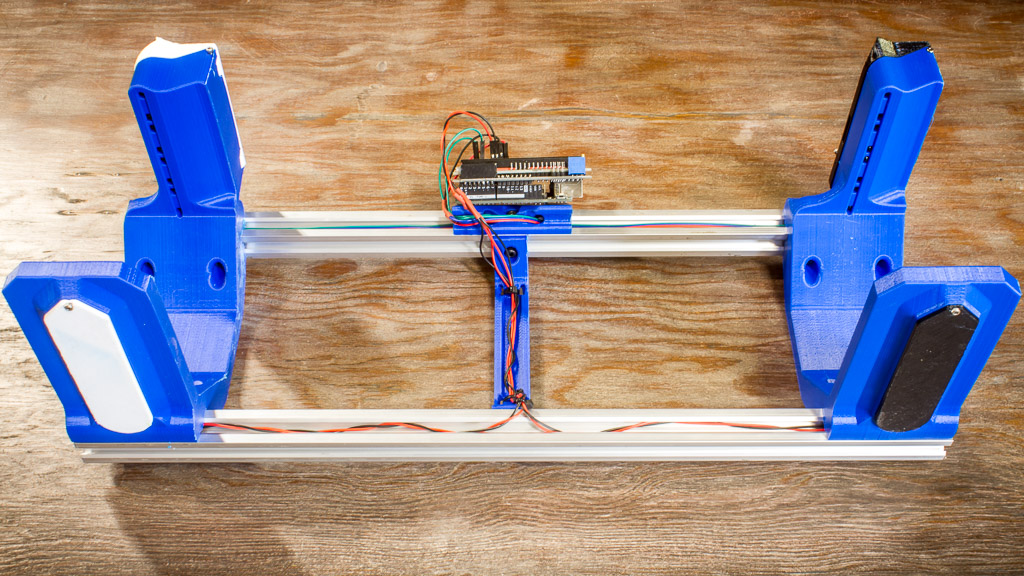
A 3D Printed Ballistic Chronograph for $70 – $100 USD!
This ballistic chronograph is based on my original design, the MK1 (which can be viewed at https://td0g.ca/2016/07/28/ballistic-chronograph/). I’ve used the MK1 to take many high-speed photos, including a shot of a mach-2 bullet hitting a nice wine glass! The new MK2 has the same performance as the original, but is much easier to construct. It can be used for measuring high-powered rifles, paintball guns, and everything between!
What’s New Since MK1?
My original ballistic chronograph has been very reliable in my high-speed photography hobby. The biggest problem with the original was that it was hand-built and couldn’t be easily reproduced. The MK2 uses the same working principals as the MK1, but has been redesigned for easy construction:
- All components are off-the-shelf or 3D printed
- The Light Gate sensors are (soon!) available on tindie.com
- Multiple sensor configurations are available (single/double sensor height, 3 mm / 2 mm slit width)
- Only simple tools are required for assembly
How To Build It?
Collect all the materials in the Bill Of Materials. Download and follow the assembly manual instructions. The total cost at the time of this writing was $95 CAD ($70 USD) for a single-height sensor or $140 CAD ($100 USD) for a double-height sensor. You will need the following tools:
- 3D printer (200 mm x 200 mm bed)
- Soldering iron
- Hacksaw
- Side cutters
- Allen wrenches
If you have any questions, feel free to leave a comment!
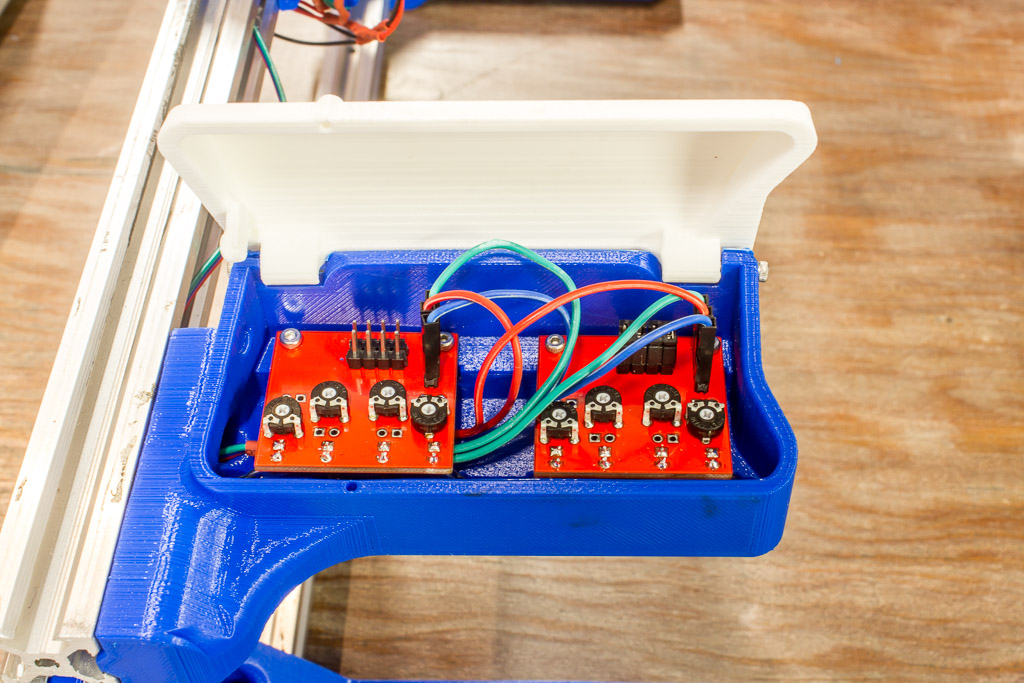
Light Gate Boards
2020-07-14 – You can purchase the light gate sensors from https://www.tindie.com/products/19828/, or feel free to build your own using the documentation in the repository! They are open-source after all!
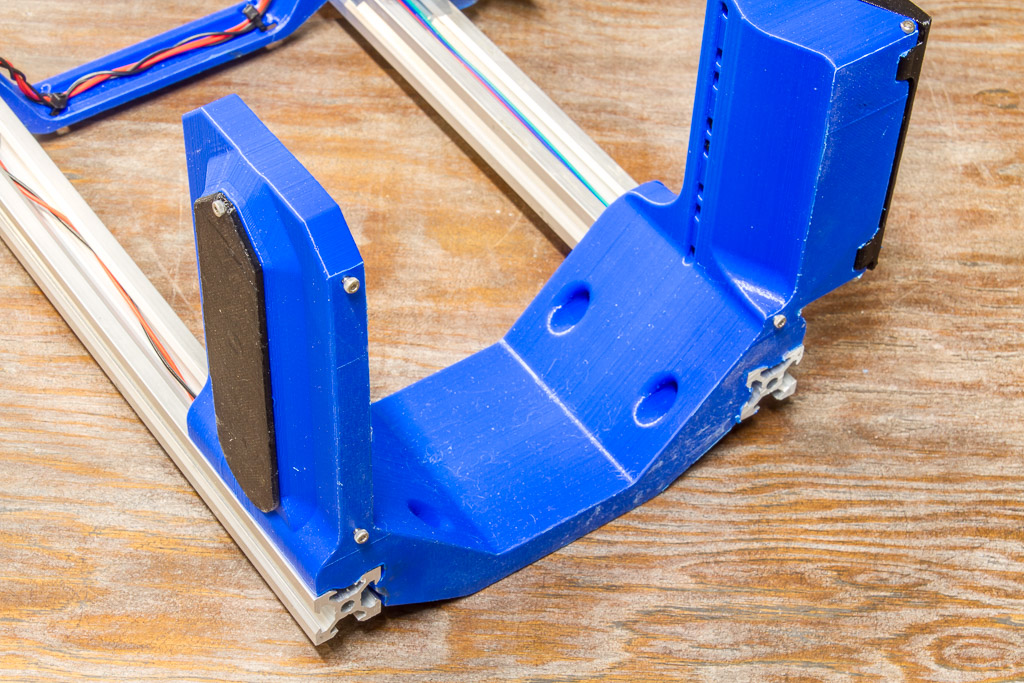
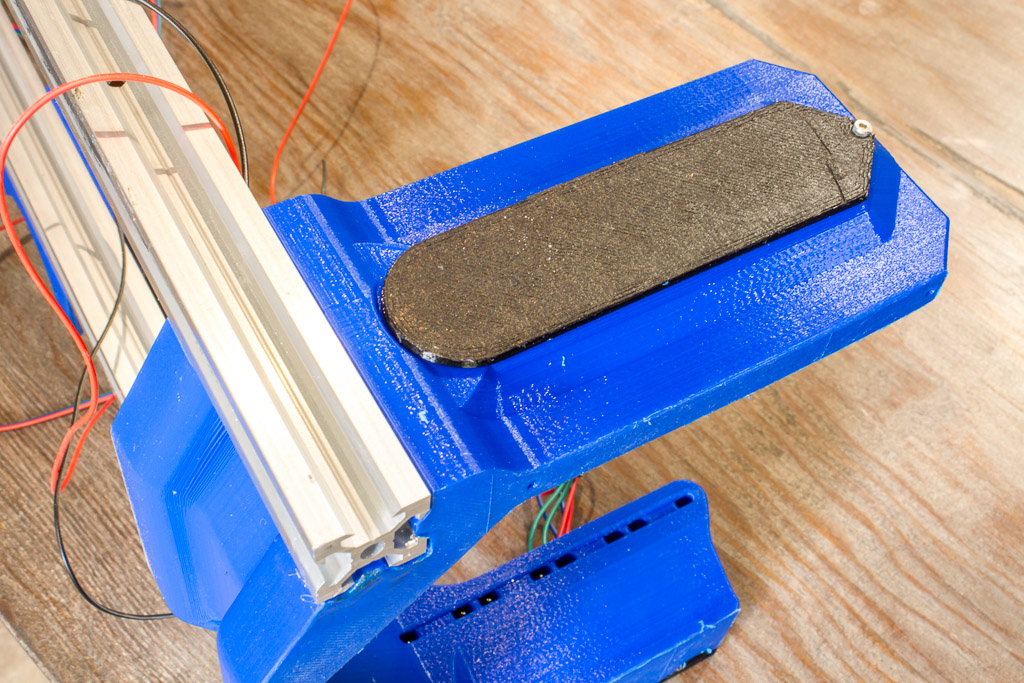
On the original ballistic chronograph, I soldered the entire photodiode circuitry onto perfboard. It was a big job and isn’t really ideal as the boards were large and ugly. Soldering a circuit on perfboard requires just a bit of skill as well, so it increases the difficulty to manufacture a ballistic chronograph. Finally, there was also the issue of the bias power supply, which I had purchased from eBay and had to mount separately from the sensors.

The new Light Gate boards I designed are smaller and much better looking. They include an onboard boost converter which supply the bias voltage and use a meager 25 mA @ 5 V. The Gerber files are available on Github and I have started manufacturing them for sale on tindie.com.
Mounting the boards in parellel result in an 85 mm sensing height. The maximum width of the sensing area (distance from sensor to emitter) is 125 mm.
Testing
I fired several different projectiles through the MK2 alongside the original ballistic chronograph. The projectile speeds ranged from 100 m/s (330 fps) to 875 m/s (2,800 fps, or mach 2.5). The raw test data is available on Github.
Both chronographs reported speeds quite consistently, although the MK2 measured about 1.5% slower than the MK1. This is probably due to a calibration issue which I need to investigate. I will update this post when I have more information. Edit 2020-05-06: I finally found the cause of the reporting error in the firmware. It was caused by a firmware issue which affected the calibration factor (actually doubling the error… The calibration factor was inverted). The original MK1 was reading 1.8% fast (0.9% * 0.9%). Correcting for this error brings the readings into fairly close agreement.
The chronographs also failed to detect a small number of projectiles. Since the number of missed shots wasn’t correlated with the projectile speed, I believe this was due to marksmanship issues (I had difficulty aiming for the sensor area). The firearms were equipped with scopes and I couldn’t use the iron sights. I also forgot to bring a rest and had to rely on my own skill (or lack thereof).
Now I’m not out to challenge commercially available chronographs. Cheap ballistic chronographs can claim an accuracy of 0.25%. If this is true (and I’ve heard a few people say that it isn’t, but lets not go there without actual test data!) then that’s better performance than this chronograph. This is a hackable, open-source design which has its own benefits.
~RABBIT TRAIL AHEAD~ While I was making the pellet rifle portion of this video, something very unusual happened. You’ll note that I fired 11 rounds into the cardboard box, which contained a small piece of plywood to stop the projectiles. I wasn’t aiming at a particular area of the box, but instead focused on the sensing areas of the ballistic chronographs. Here’s what I found inside the box: several (maybe 6?) Robin-Hooded pellets! Never tell me the odds…
Photos


This work is licensed under a Creative Commons Attribution 4.0 International License.
1 thought on “Ballistic Chronograph MK2 #DIY”